Install Git on Mac
There are several ways to install Git on a Mac, as it comes pre-installed with Xcode or its command-line tools. To start using Git, open the terminal and enter the following command.
$ git --version
The command above will show the installed version of Git.
Output:
git version 2.24.0 (Apple Git-66)
If Git isn't already installed, the command will prompt you to install it.
Apple offers support for Git, but it often lags behind by several major versions. To install a newer version, you can use one of the following methods:
Git Installer for Mac
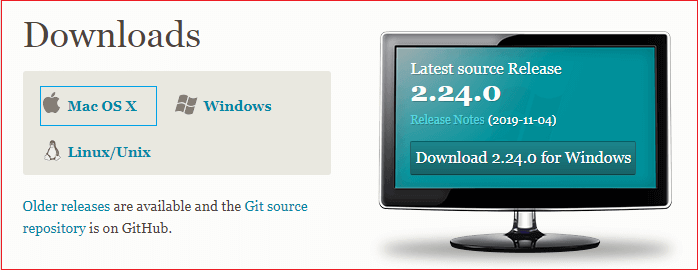
This is the easiest method to download the latest version of Git. Simply visit the official Git downloads page and select the option for Max OS X

The installer file will be downloaded to your system. Follow the prompts and select the appropriate installer option. Once the installation is complete, verify its success by running the following command in the terminal:
$ git-- version
The command above will display the installed version of Git. Refer to the output below.
Output:
$ git-- version 2.24.0 (Apple Git-66)
With the latest version installed on macOS, it's now time to configure the version control system for its initial use.
To set up a username, use the following command:
$ git config --global user.name "John"
To associate an email address with the author, use the following command:
$ git config --global user.name "John@xyz"
For a detailed overview of the `git config` command, visit this link.
Installation via MacPorts
MacPorts, sometimes known as DarwinPorts, simplifies the installation of software on macOS and Darwin operating systems. If you have MacPorts installed for managing packages on OS X, follow these steps to install Git.
Step 1: Update MacPorts
To update MacPorts, use the following command:
$ sudo port selfupdate
Step 2: Search for the most recent Ports
To find the most recent Git ports and variants, use the following command:
$ port search git
$ post variants git
The command above will search for the latest available port and options and then install them.
Step 3: Install Git
To install Git, use the following command:
$ sudo port install git
You can also install additional tools with Git to enhance its functionality. To install Git along with bash-completion, SVN, and the documentation, use the following command:
$ sudo port install git +svn +doc +bash_completion +gitweb
We have now successfully installed Git on our system using MacPorts.
Step 4: Configure Git
The next step is to configure Git for initial use.
We will configure Git with the same username and email address as provided earlier.
To set up a username, use the following command:
$ git config --global user.name "John"
To set an email address for the author, use the following command:
$ git config --global user.email "john@xyz"
Install git via Homebrew
Homebrew simplifies the software installation process. If you have Homebrew installed for managing packages on macOS, follow these steps to install Git:
Step 1: Install Git
Open the terminal and use the following command to install Git with Homebrew:
$ brew install git
The command above will install Git on your machine. The next step is to verify the installation.
Step 2: Verify the Installation
It's important to verify whether the installation process was successful.
To confirm the installation was successful, use the following command:
$ git --version
The command above will show the version installed on your system. Refer to the output below:
git version 2.24.0
Step 3: configure Git
We will configure Git with the same username and email address as provided earlier.
To set a username, use the following command:
$ git config --global user.name "John"
To set an email address for the author, use the following command:
$ git config --global user.email "John@xyz"
